HTML + CSS - Lesson 2
Learning CSS
In this lesson, we will continue to use HTML to add more elements to our website as well as beginning to style the website using CSS for the first time.
First, we are going to create a button that links to a separate webpage where we can share photos, write a blog, etc. beyond the home page. Do this add <button> </button> tags after the </p> tag. In the middle of the tags we will write the title of this next page: <button> My Blog! </button>
Your code should look like this:
    <!DOCTYPE html>
      <html>
        <head>
          <title>
             Your Website Name!
          </title>
        </head>
        <body>
          <h1>
             Website Name
          </h1>
          <p>
             <b>
               Welcome to my website! On this website I will be sharing____
             </b>
          </p>
        </body>
      </html>
Now that we have a good amount of items on our website, we should begin styling it as it looks very bland at the moment.
To do this, we can simply add a tag. This is a simpler way to write CSS rather than creating a brand new style.css file. As long as we write in between those tags following poroper CSS syntax and logic, then we can write in the CSS!
    <!DOCTYPE html>
      <html>
        <head>
          <title>
             Your Website Name!
          </title>
          <style>

          </style>
        </head>
        <body>
          <h1>
             Website Name
          </h1>
          <p>
             <b>
               Welcome to my website! On this website I will be sharing____
             </b>
          </p>
          <button>
            My Blog!
          </button>
        </body>
      </html>
In between the <style> tag we are going to let the CSS know what we are talking about. Since CSS is a styling language, we are going to begin adding color to this initial webpage. Therefore we use selectors to tell the CSS what we want to style from the HTML.
To do this, write the tag from the html without the arrows (<>) and add { after it. Note this way of writing code is different from HTML because each coding language is unique in its own way so there is always a variation to how they are written.
    <!DOCTYPE html>
      <html>
        <head>
          <title>
             Your Website Name!
          </title>
          <style>
            p {
            }
          </style>
        </head>
        <body>
          <h1>
             Website Name
          </h1>
          <p>
             <b>
               Welcome to my website! On this website I will be sharing____
             </b>
          </p>
          <button>
            My Blog!
          </button>
        </body>
      </html>
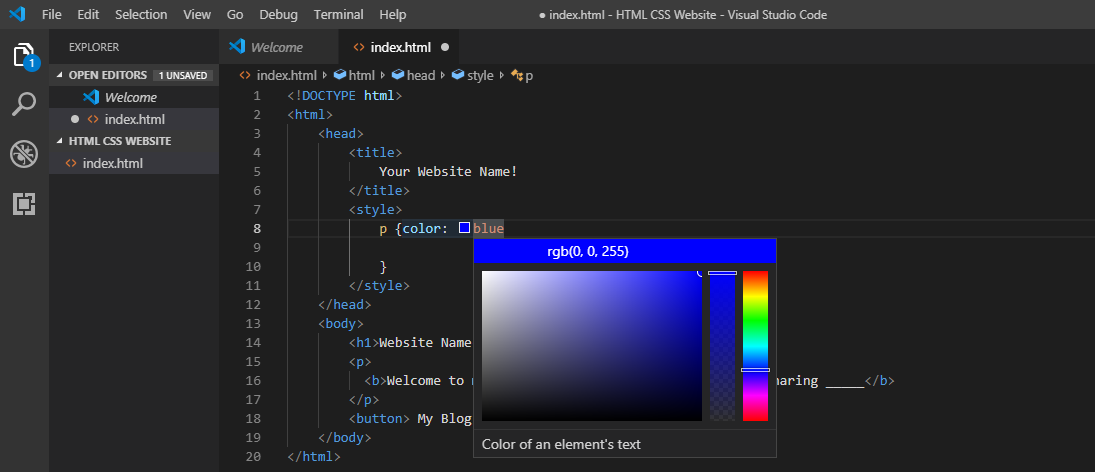
As the p tag is selected, the paragraph will be styled. In between the { } write color: . You can pick any of the colors that come up, or hover over the color after you selected one to choose any color.
    <!DOCTYPE html>
      <html>
        <head>
          <title>
             Your Website Name!
          </title>
          <style>
            p {color: blue
            }
          </style>
        </head>
        <body>
          <h1>
             Website Name
          </h1>
          <p>
             <b>
               Welcome to my website! On this website I will be sharing____
             </b>
          </p>
          <button>
            My Blog!
          </button>
        </body>
      </html>
After writing a line of CSS, it is important to use a semicolon ( ; ) which allows the browser to know that you are writing different lines of code.
Using the same techniques, we can change the font of the website. Under the style tag write body { font-family:
Following this, many a list of many different fonts should come up:
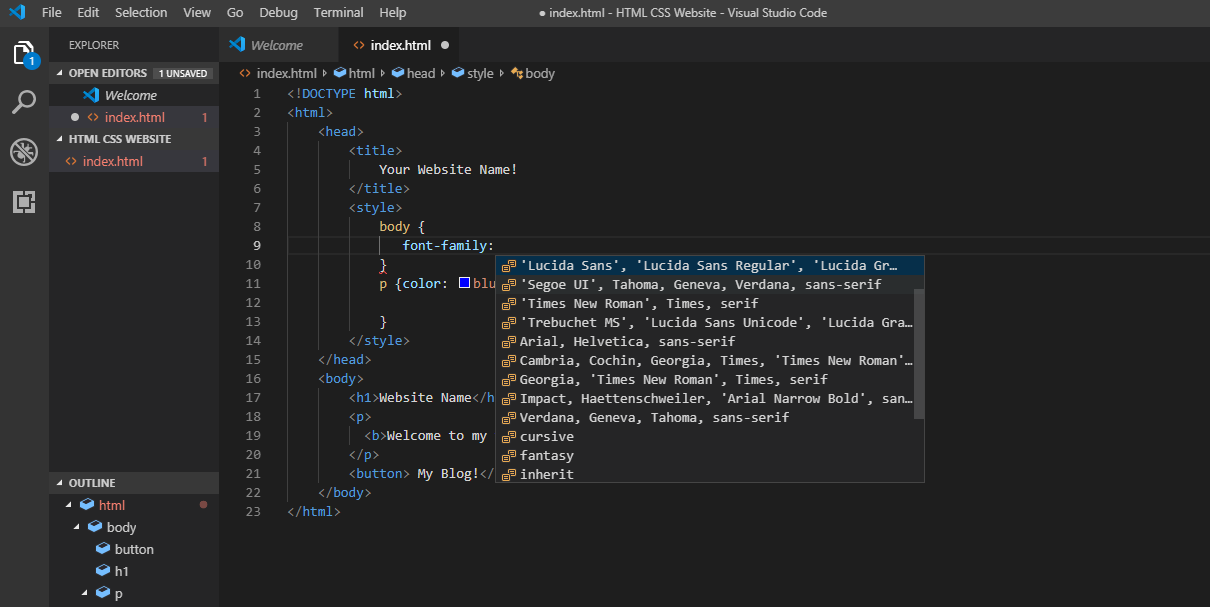
Click on the one that you like best!
The reason why there are so many fonts in the line of code is because different computer operating systems cannot process different fonts. Therefore, if the first font is not available, then the computer will go to the next font and so on.
Just as HTML uses arrows, <> , again, to separate lines of code, CSS uses semicolons, ; , so use this to separate your lines of CSS Code.
Now it is your turn! Using the information taught in this lesson, style the colors and fonts of the different elements of your website!
This is how mine came out so far!
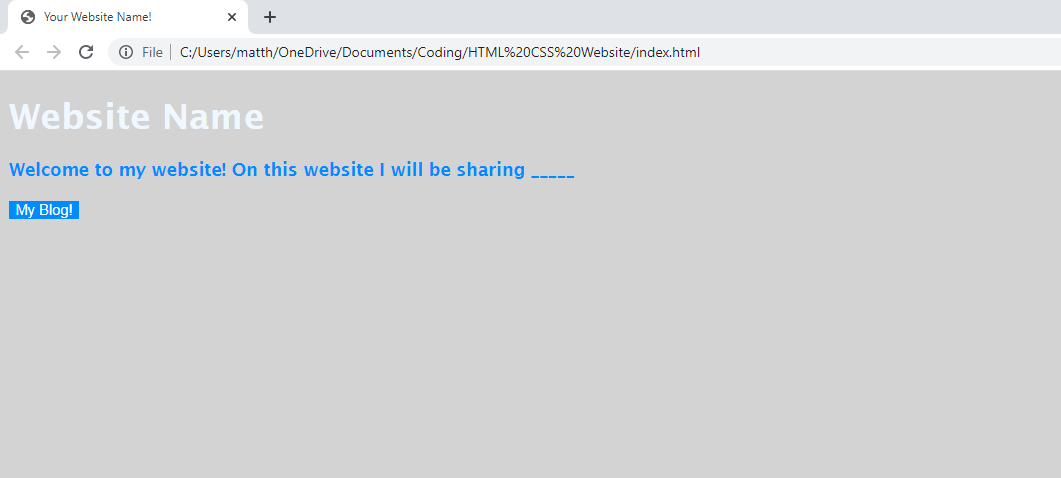
Here is my code:
     <!DOCTYPE html>
      <html>
        <head>
          <title>
             Your Website Name!
          </title>
          <style>
           body {
              font-family: 'Lucida Sans', 'Lucida Sans Regular', 'Lucida Grande', 'Lucida Sans Unicode';
              color: aliceblue;
              background:rgb(211, 211, 211);
           }
           p {color: rgb(0, 140, 255)
           }
           button {
              background: rgb(0, 140, 255)
              color: white:
              border: gray:
           }
          </style>
        </head>
        <body>
          <h1>
             Website Name
          </h1>
          <p>
             <b>
               Welcome to my website! On this website I will be sharing____
             </b>
          </p>
        </body>
      </html>